My journey started back in 2018, sitting in the Australian sun under the approaching traffic into Sydney Kingford Smith Airport. I just had finished my apprenticeship and wanted to have an Airbus A320 home cockpit but there weren’t any affordable home cockpit options and no comprehensive source for building your own on the cheap was to be found either so I wanted to design one my self. I started kicad for the very first time and tried to make things happen… without knowing how to do PCB design tho, reality caught up to me, knowing that I don’t have the skills for making this happen, so I quickly gave up, only the dream kept living on for a few years. End of 2023 I lost my job, and due to burnout I wasn’t looking for anything new which gave me more time (altho with limited concentration). Shortly after I came across someone one fedi who was developing their own PCBs and who were up for mentoring and teaching me.I created my first PCB and suddenly, making the dream happen was with in reach.
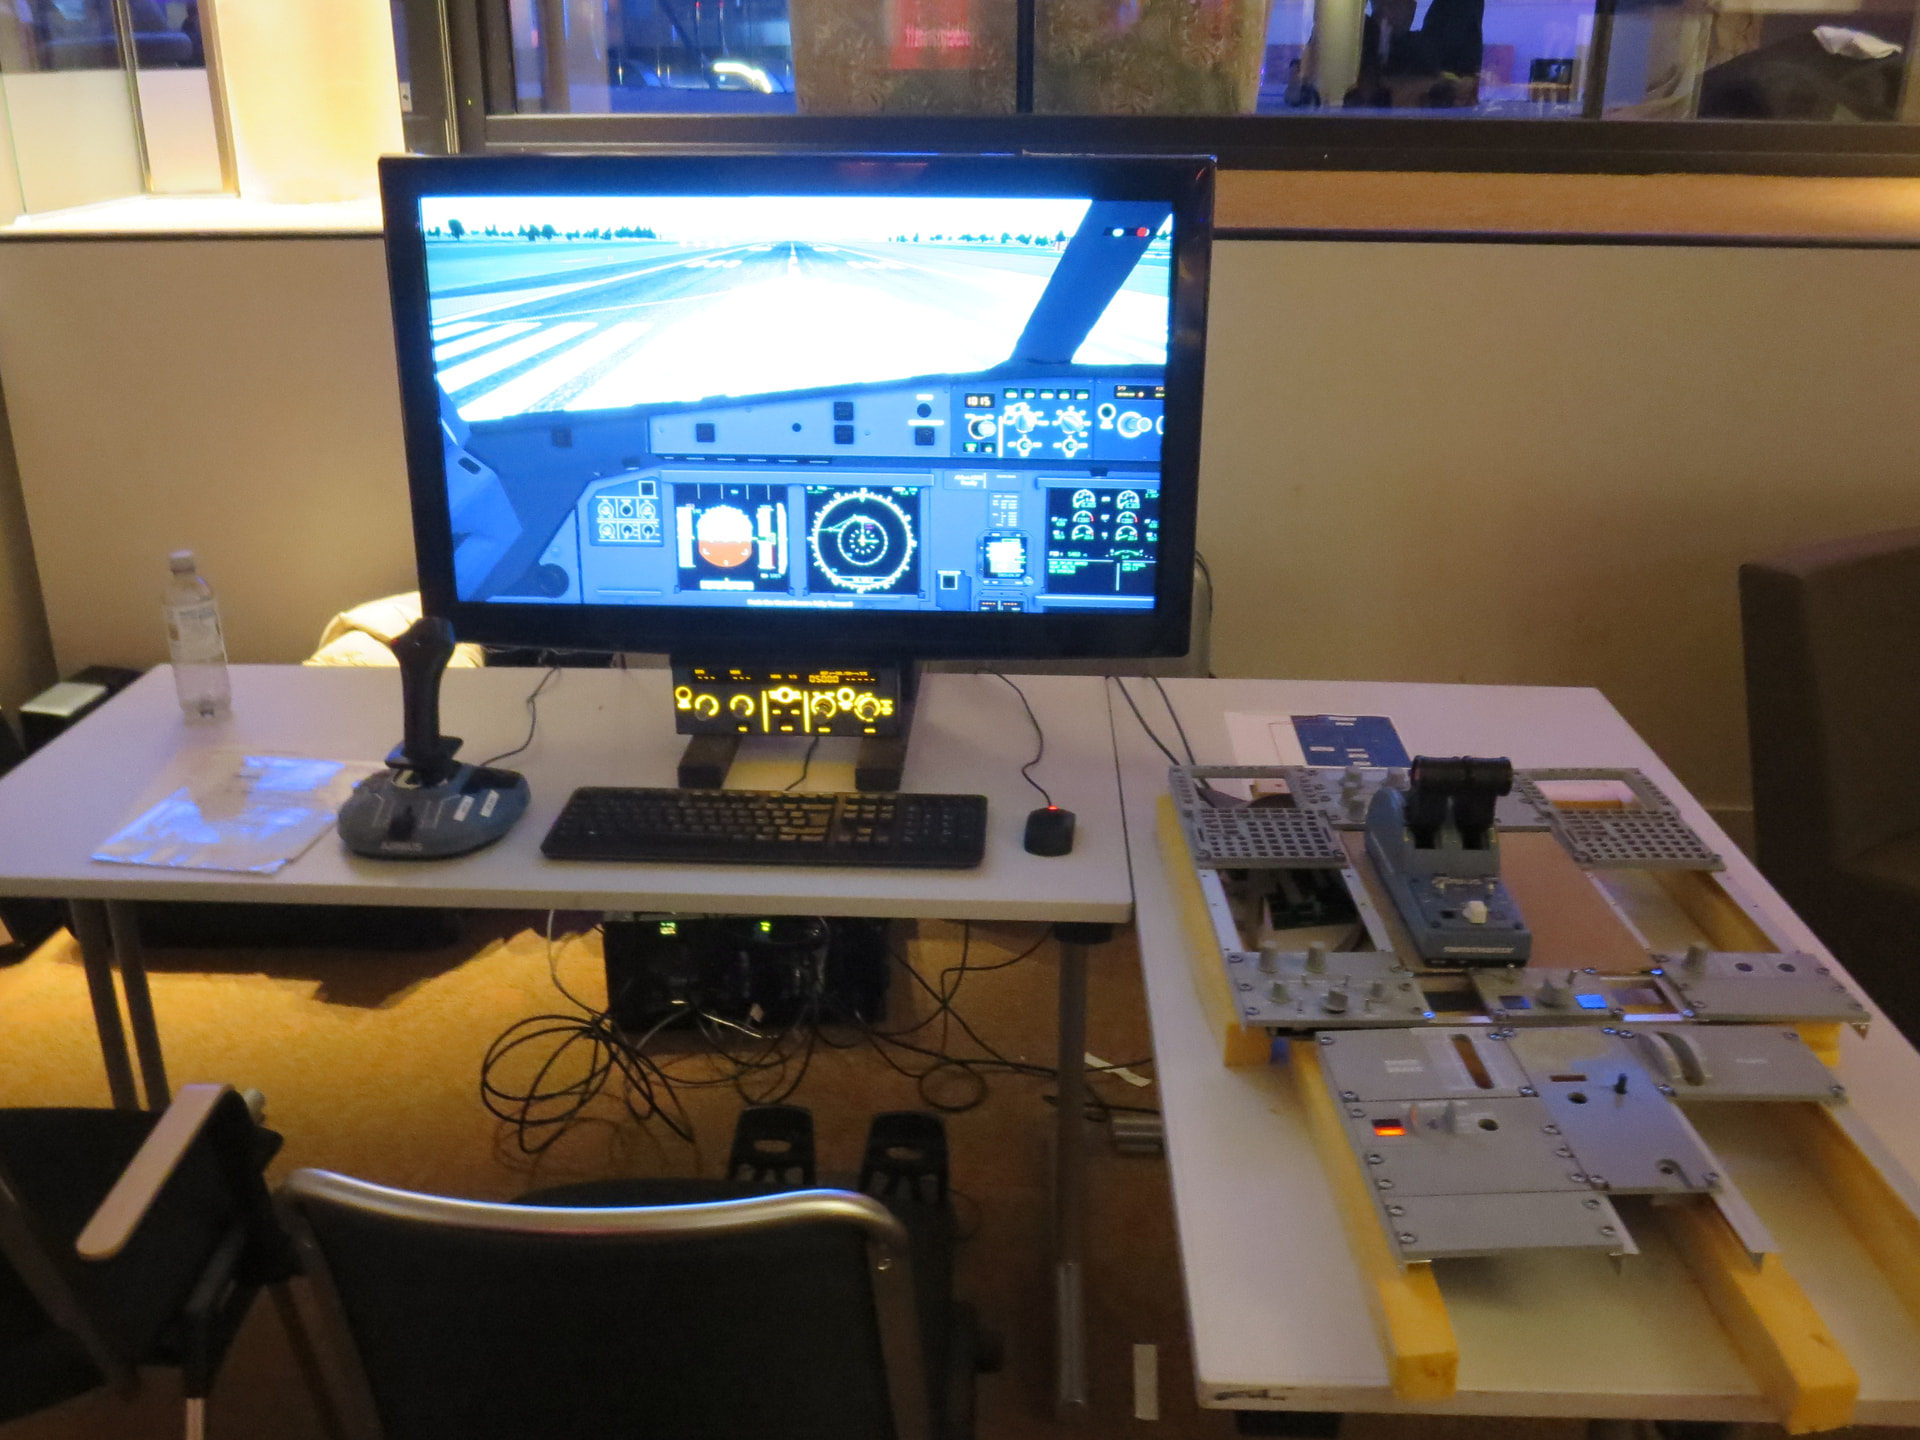
So the journey of my cockpit began. I started out working on the pedestal, which is the part between the pilots which has many very important elements on it like the MCDU (the interface to the flight management computer), the radio panel for control over the communications as well as the thrust levers for engine control and levers for the flaps and speed brakes. Most DIY cockpits you can find images of out there are a big wire mess, an approach I didn’t like so for the pedestal, I decided I want one central PCB which connects via USB to the PC and then has only one cable for each panels PCB to keep things relatively tidy and also easier to dis- and reassemble.
After learning basic PCB design, I also had to learn how to write firmware for my PCBs. Here I used Rust, which I learned for this project. For the communication protocol with the PC I chose USB HID, the human interface device class which enables the device to run on all major operating systems and will make it show up as an input device in all simulators, making the controls easy to map with the in-simulator configuration dialog.
After a while I had my first few PCBs together, next step in summer 2024 was to learn how to do CAD design for my panel front plates.
This was also a steep learning curve. I had basic panels figured out rather quickly but for the more mechanical parts I’m still gathering experience and only dared now, after over a year of working in CAD programs to even attempt building the thrust levers. Together with this I also had a lot to learn about 3D printing in general. I got a used 3D printer offered for free with which I made my first steps. After half a year and my 3rd hand printer as well as another printer which a friend lend me, both degraded into basically unusable state, I finally bought my own first 3D printer. Over time I then also learned how to design for 3D printing, so things print better, have little to no support, if there’s support make that easily removable and so on.
The scope of my project started to expand after I held a talk about it at MRMCD, now wanting everything to be easily reproducible by others. I also started taking the sim to events such as the 38C3, the 38th Chaos Communication Congress, where it gathered a large crowd all day long.
S
For the markings I started out using stickers. They look great on panels and are simple to come by (just requiring one to order them as sticker sheet). The down side of using stickers is, that one can not use them to back light the panels. Since one of my goals is that it can be easily be reproduced, I do stick with this as a basic option. I do want to have the option for back lit panels tho. The best way to do that is to first paint acrylic glass panels, then engrave the markings into them. A first test showed quite promising results. Unfortunately I don’t have easy access to a laser right now so it is hard to iterate and improve this design. Another part where I’m a bit held back due to lack of accessible equipment is using dual filament 3D printing. While stickers look clearly readable for buttons, on small ones, they tend to come off rather quickly, even after I gave them a good spray with some clear coat in the hope to adhere the stickers better to the 3D print. Even with limited access to such a printer, I was able to make quite good buttons for most panels, there are some issues tho which I was so far not able to try to work out.
Early 2025, most of the pedestal was done in a first mostly working revision, but I was still holding back on the thrust levers and other mechanical parts cause I was not confident enough in my CAD skills yet, so I started to work on the overhead panels. At the same time I started working on a structure to put the panels on. Here I still got a lot to learn and my current design is far from ideal and progress is slow as it’s one of my least favorite things to work on in this project.
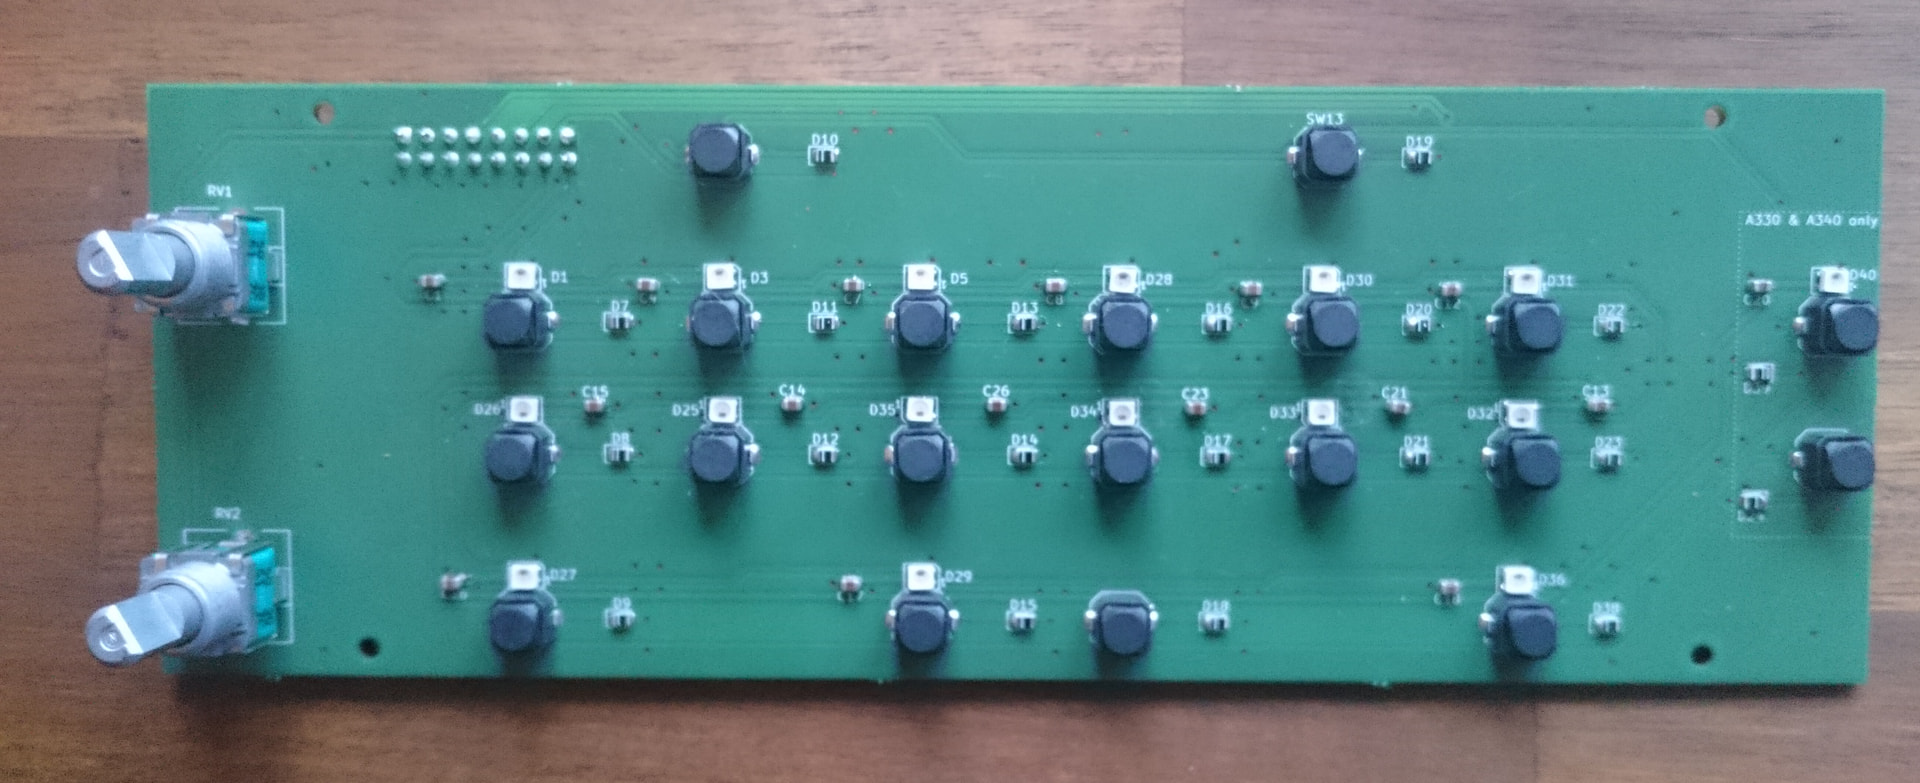
In summer 2025, Aisler offered me to sponsor the development of the PCBs which is a great help since I am still recovering from burnout and cause of that currently don’t have a job so progress was often limited by how much money of my budget I had left at the end of the month to spend on the project.With the sponsorship, Aisler didn’t just allow me to move forward faster than before but also opened the option to implement some things from my wish list and re-design some of my very early PCBs with the knowledge I gained in the almost 2 years I’m working on the cockpit now. Reworking one of the central PCBs also opened up to now think ahead and prepare it to be re-used in case I want to build an A330 and/or A340 cockpit at some point in the future, since those two aircraft have high commonality with the A320.
As I’m writing this, I’m preparing the simulator for 39C3, the 39th Chaos Communication Congress, where I will once again be showing off the simulator to the chaos community. I do hope that I get to mostly finish this project in 2026 and maybe start fulfilling my dream of building an A330 and A340 as well.
Thanks again to the Aisler team. You folks don‘t feel to me like you‘re a company where I‘m the customer but like some helpful being at a hackspace! Keep up the good work and see you in 2026!