I integrated a capacitive touch sensor completely behind a 1–2 mm thick enclosure wall.
No hole, no mechanical button – touch works reliably through the housing, including LED feedback.
The key is not the sensor itself, but the CAD model and printing workflow.
Setup
-
Capacitive touch sensor mounted directly behind the enclosure wall
-
Square touch area in the housing, printed with transparent filament
-
Wall thickness of the touch zone: ~1–2 mm
-
The sensor’s LED shines cleanly through, touch response is stable
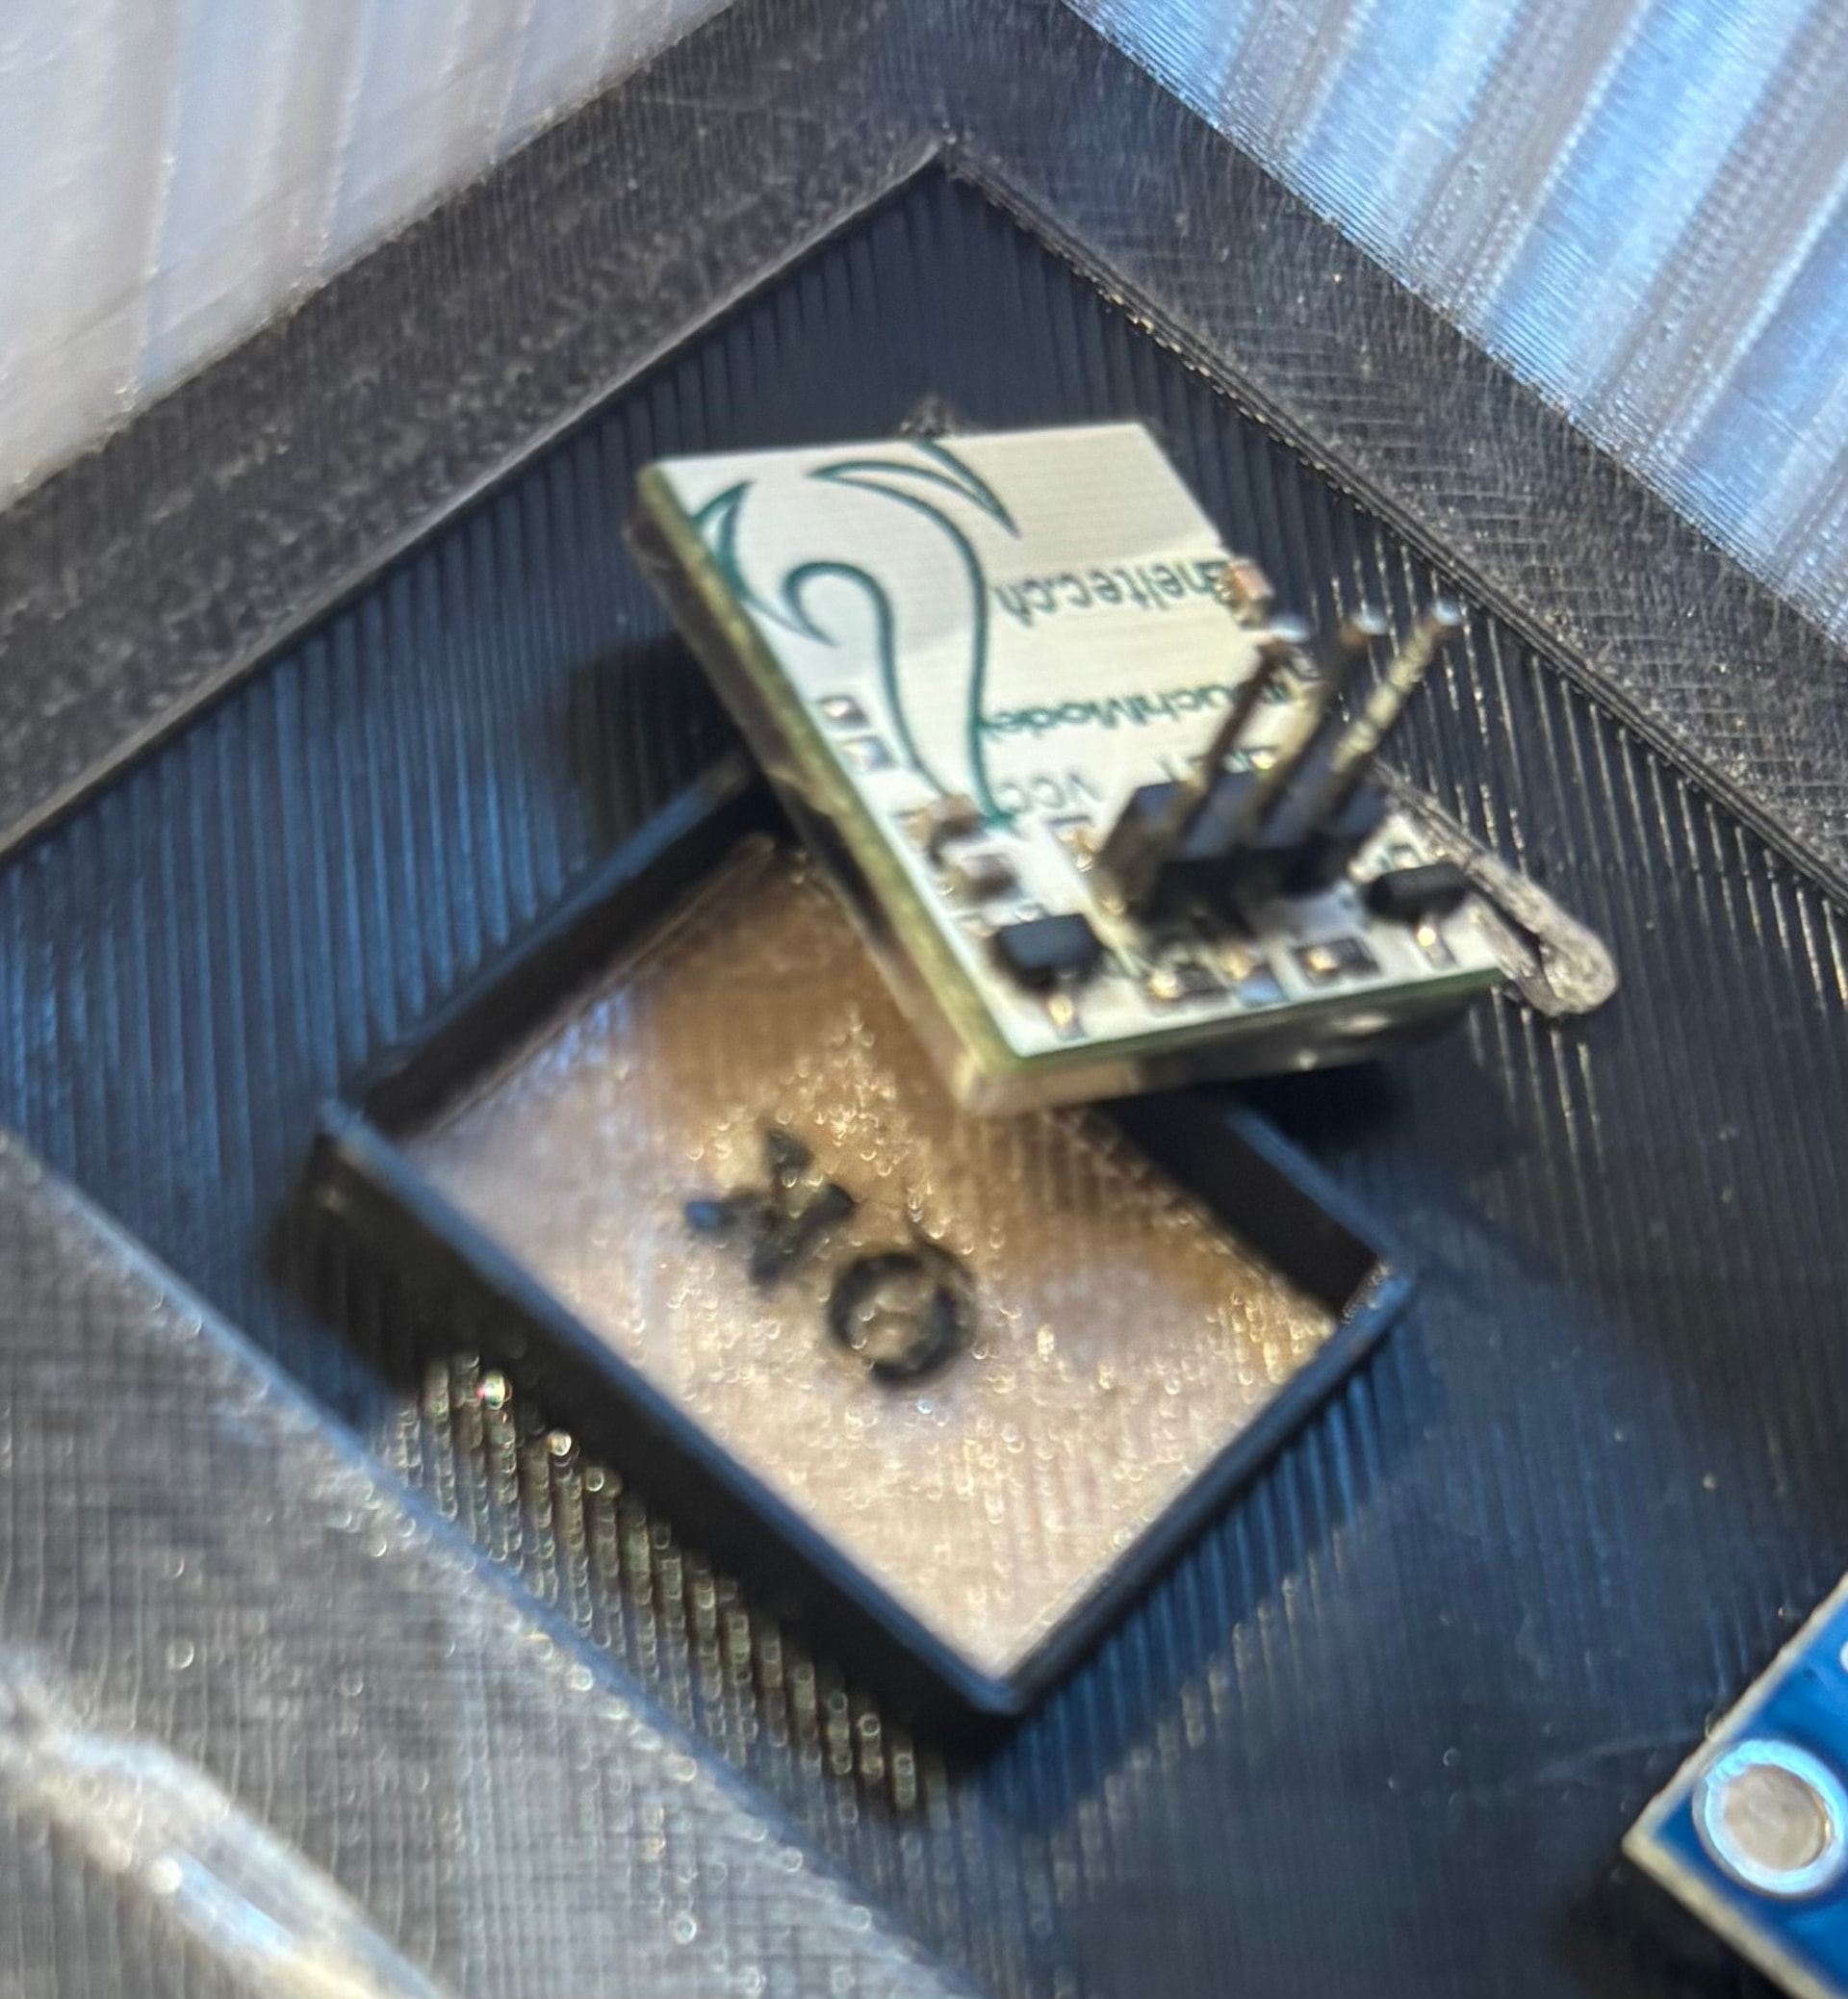
Inside view: touch module placed directly behind the enclosure wall.
Tinkercad setup (important)
The transparent touch area must be a separate object.
Object structure:
-
Main enclosure body
-
Transparent touch window (separate solid)
-
Optional: label or symbol (e.g. “OK”) as another separate object
Do not group everything into a single body.
Export:
![]() OBJ, not STL
OBJ, not STL
-
OBJ preserves individual objects
-
STL merges everything into one mesh → no material assignment in the slicer
In Bambu Studio / Bambu Slicer
-
Import the OBJ file
-
Assign filaments per object:
-
Enclosure → standard filament
-
Touch window → transparent filament
-
Label → contrasting color
-
-
AMS handles the material changes automatically

Power off: completely smooth surface, no opening, no visible layers.
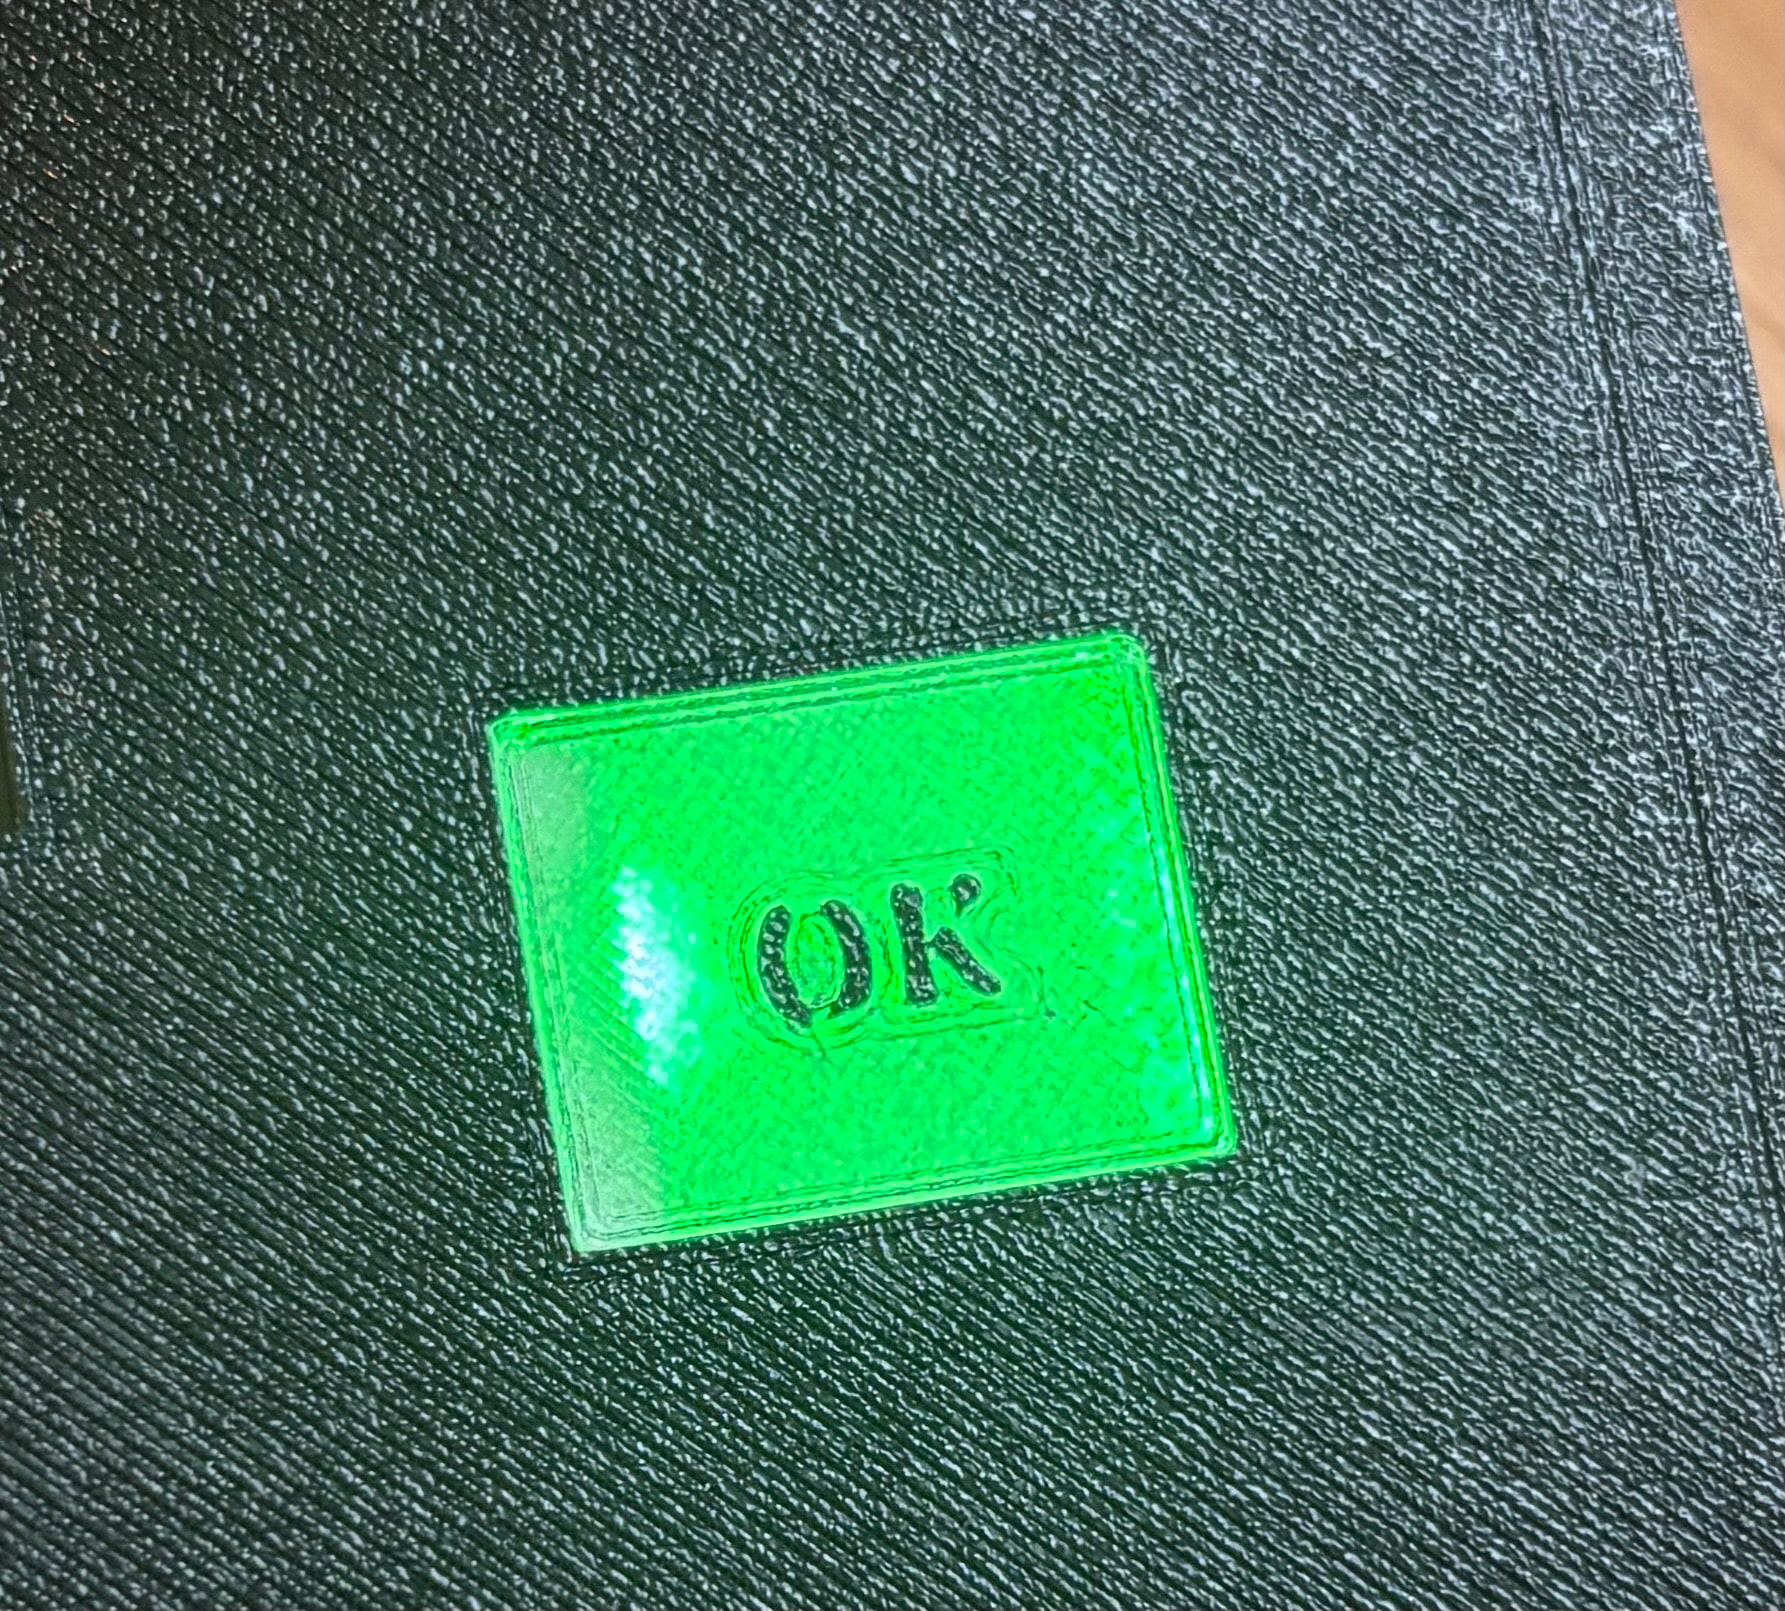
Power on: LED and label clearly visible through the transparent window.
Pro tip: print orientation
Place the visible and touchable surface of the transparent window directly on the build plate.
Effect:
-
Perfectly seamless surface
-
No layer texture, no sharp edges
-
Slightly diffuse, glass-like appearance
-
Excellent haptics for touch interaction
Transparent filament benefits massively from this – visually and functionally.
Practical notes
-
Keep the transparent wall ≤ ~2 mm
-
Mount the sensor as flat as possible, minimize air gap
-
Rectangular touch areas work more reliably than very fine shapes
-
Prefer a smooth build plate (smooth PEI or glass)
Short version:
Capacitive touch + multi-material printing + proper object separation + smart print orientation
= a clean, robust button without any mechanics.
Once you’ve built it like this, mechanical buttons feel outdated.
Optional: haptic feedback via vibration motor
If you want active haptic feedback, you can add a small vibration motor (coin or cylinder type).
-
Driven directly from a GPIO, transistor, or motor driver
-
Short pulse on touch event → clear tactile confirmation
-
Works well in combination with the seamless touch surface
-
Especially useful when the LED is not visible or in bright environments
This keeps the UI fully sealed while still providing physical feedback.