Overview
Smart Guide is a tool we developed to make hand assembly simpler and less error-prone by breaking down the assembly process into simple to follow steps.
Prerequisites
To use Smart Guide, you need to meet the following prerequisites:
- You need to upload the project in a supported format.
- Components you would like to assemble need to assigned.
- The Components are available in our Database
To display the components, you would like to assemble, we need you to upload your project in a supported format, so the parts list and component positions can be processed by us, and be shown in the viewer. Supported Design Tools (EDA) and File Formats include KiCad, EAGLE, Altium, Target3001!, ODB++ and more.
Smart Guide has to know which components you would like to assemble and which ones to leave out. This is done by assigning or excluding them, in our BOM Manager.
The Interface
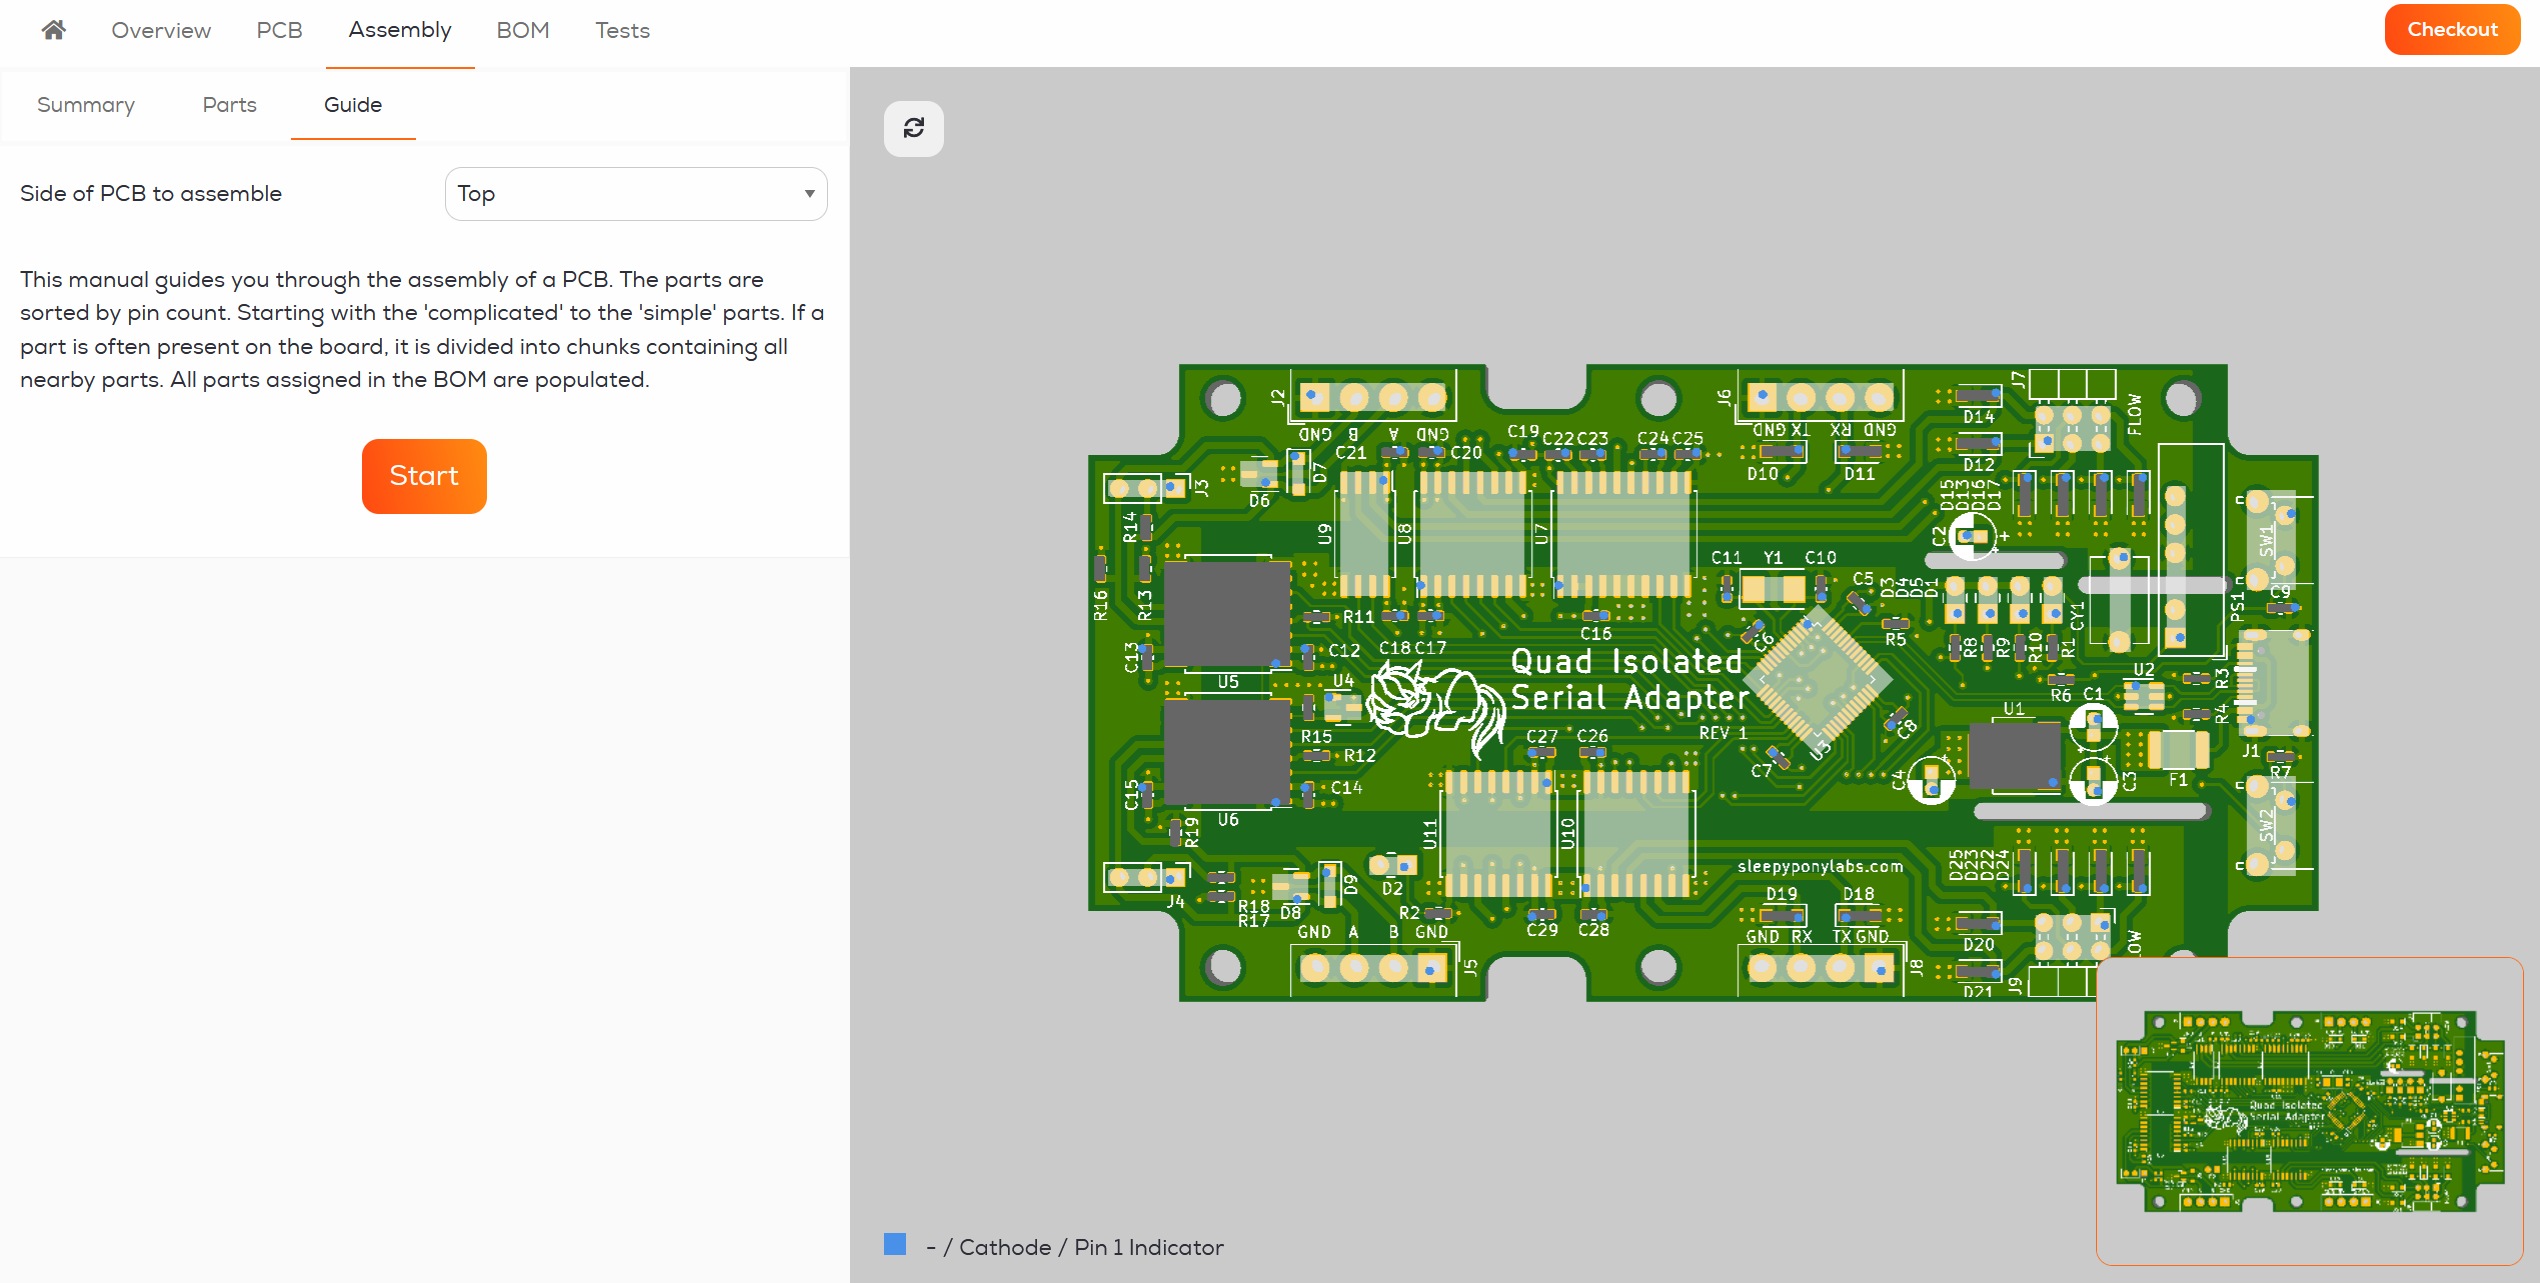
The Smart Guide can be found under Assembly → Guide. In the beginning, you will be asked which side of the PCB you would like to assemble.
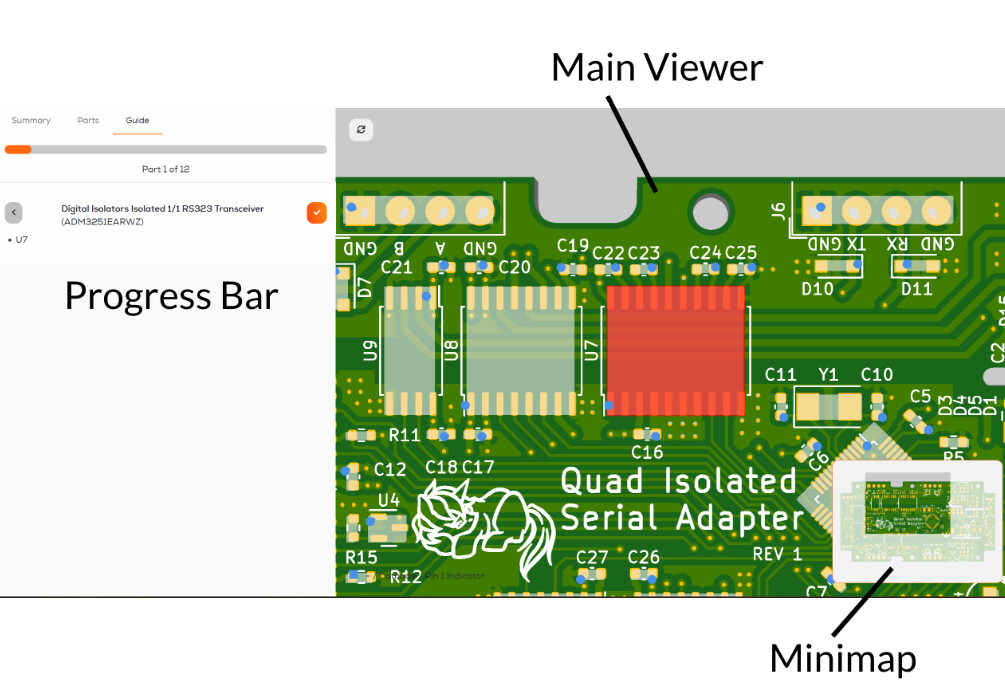
This will open up the main view. On the left, you’ll see the which component you need to place in this assembly step. Smart Guide sorts the components by size and location, starting with larger components in the middle of the PCB, working towards the edges, followed by the smaller components grouped in chunks. A progress bar indicates how far you have come along in the assembly process.
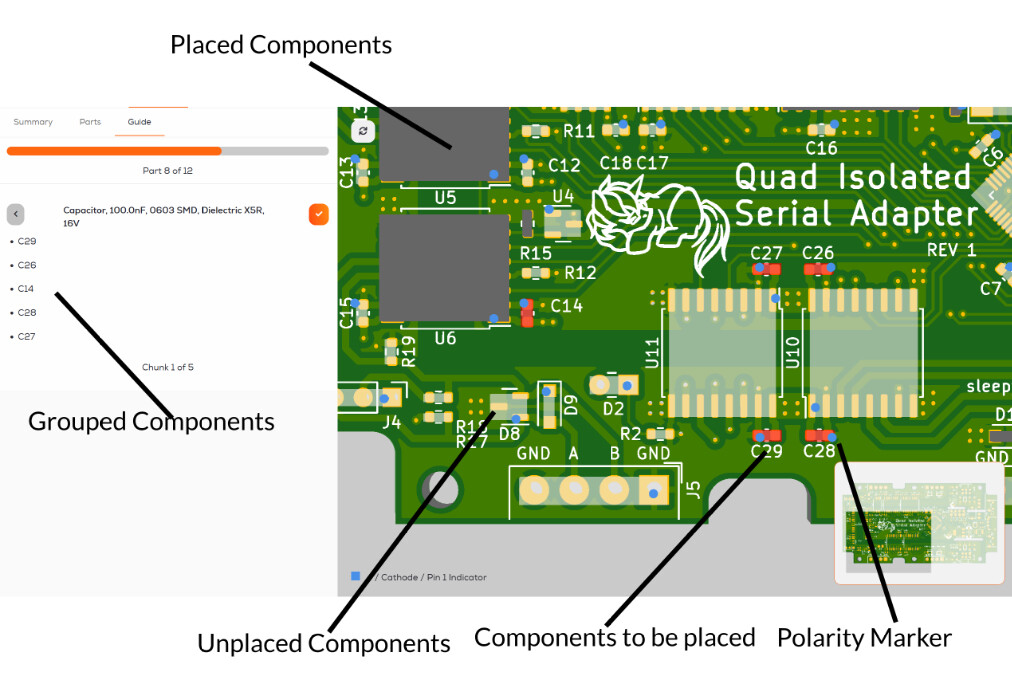
The component(s) to be soldered in the current step are highlighted in red, and their 1st/polarity is indicated by a blue dot. After soldering all the components, in that step you can progress to the next one by clicking on the orange checkmark or by pressing n on your keyboard. You can navigate back to the previous step by clicking on the gray arrow or by pressing b on the keyboard.
Placed Components are displayed in gray and unplaced components in a translucent white color.
Happy Soldering ![]()