We support Autodesk Fusion360 out-of-the-box and prepare your design files for manufacturing using our automated software pipeline. If you have any questions or want to make remarks, please contact our support before ordering, as we do not read notes included in your project files.
How to export ODB++ from Fusion360
Open up your PCB file and make sure all planes and polygons are updated, make sure to run the DRC to catch any errors, if there are any, please resolve them.
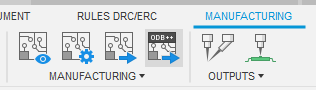
If that is done navigate to Manufacturing, now select the ODB++ output.
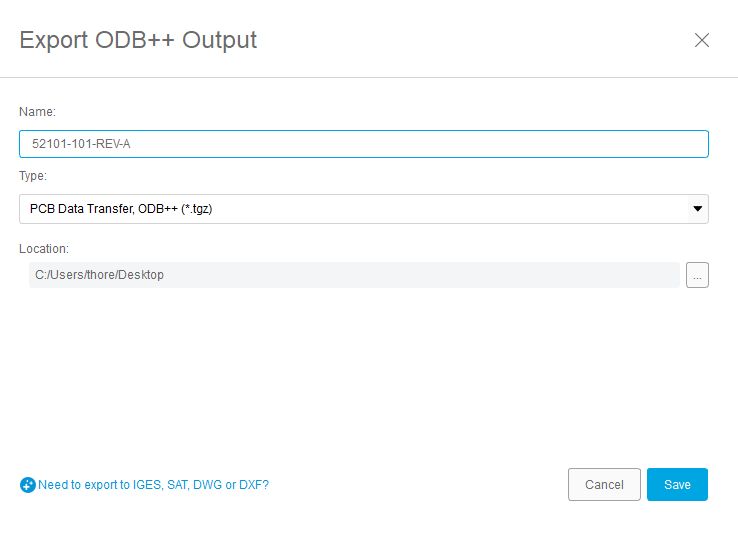
This will open up a dialog with a few options. You can choose the name of the archive file as well as the type. And lastly where you want to save your file.
You can select either .zip or .tgz or .tar we import all those formats.
Now just upload your file.
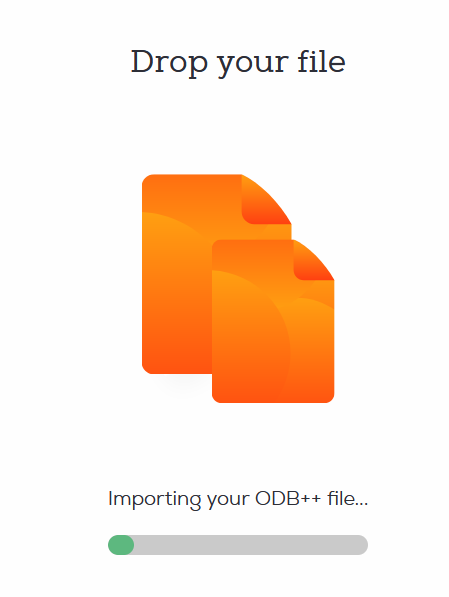
After we processed the ODB++ file you can inspect the boards using our board viewer.
We give a rendering guarantee that the boards are manufactured as displayed in our viewer. You can read this article if you are unsure how to use our board viewer or if you want to know how the rendering guarantee works.
Add plated slots to a footprint
Overview
The most recent versions of Fusion360 have added support for plated slots, in this How-To guide we explain how you add them to your footprint and why you need to update your legacy libraries.
Creating a footprint with plated slots
- Click “File” → “New electronics library” or open an existing library.
- Click “Create new footprint” and name it, or open an existing footprint.
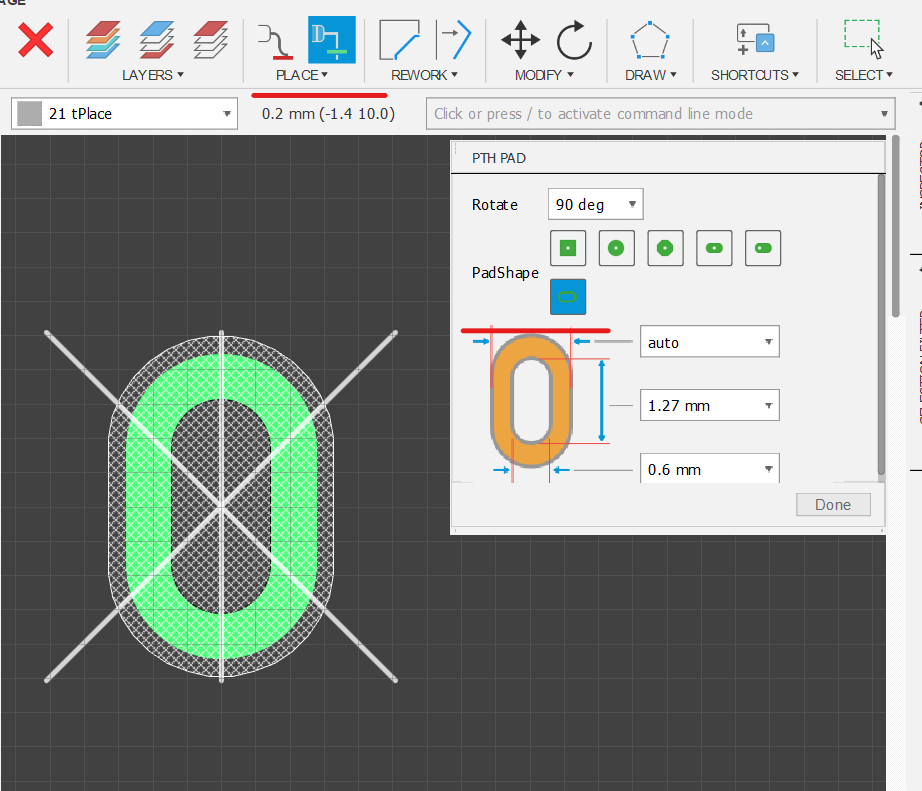
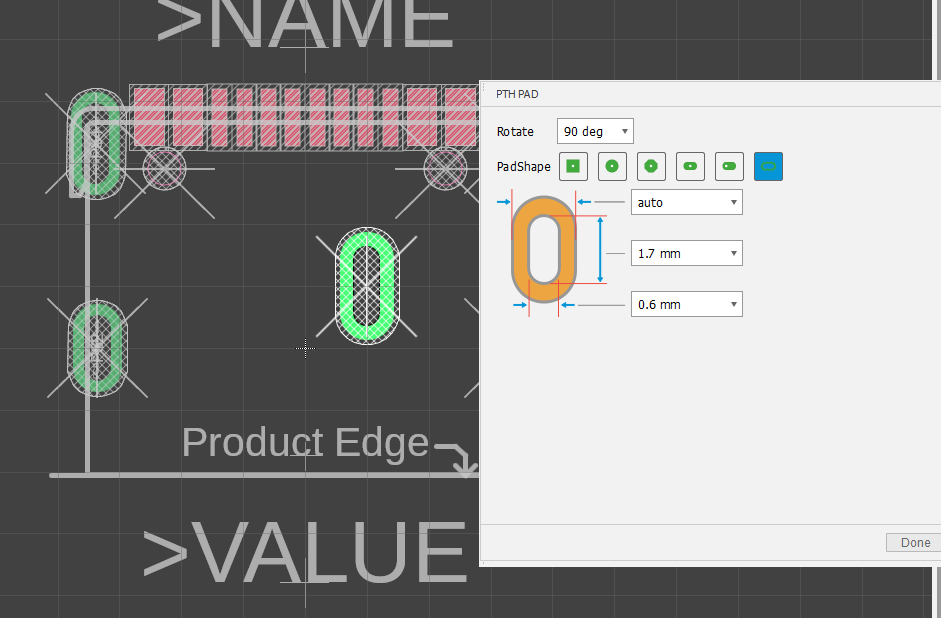
- Click the “Place PTH Pad” button.
- Select the “Slot” option.
- Specify the length of the inner slot and the annular ring, keep in mind to follow our design rules.
- Place the pad
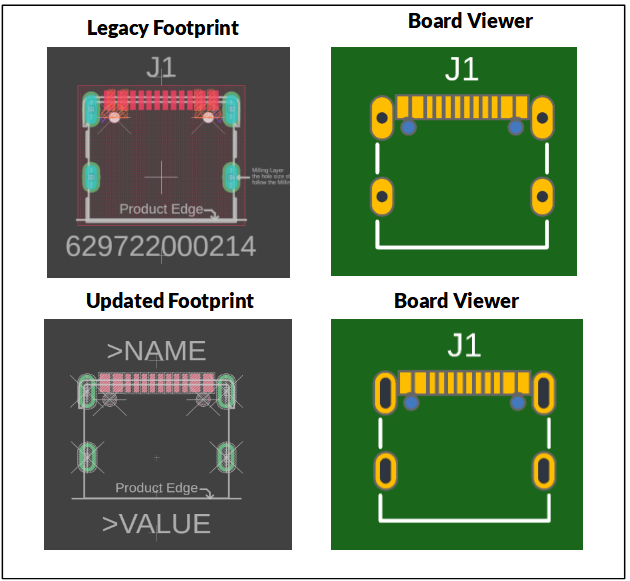
Updating Legacy Footprints.
Autodesk EAGLE and earlier versions of Fusion360 did not feature an option to create plated slots, thus many designers had to resort to hacky workaround with the pads and milling layer. These workarounds have always been problematic and difficult for the designer and fabricator.
Recent changes to Fusion360 have disabled the milling layer for ODB++, breaking legacy designs imported from EAGLE or created in older versions of Fusion360, meaning that the footprints have to be updated.
1. Open the library
To open the library for the part you want to change, right-click click on it in the “Place Component” tool of the schematic editor.
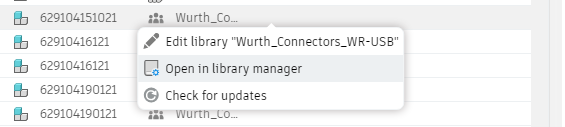
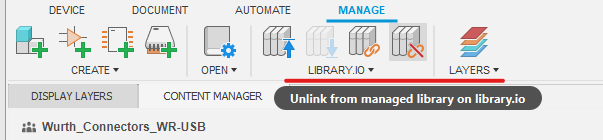
When updating a footprint in a personal library, no further preparations are needed. 3rd party libraries need to be unlinked from the library.io database in order to be edited. Another option is to copy the component you would like to update into a new library.
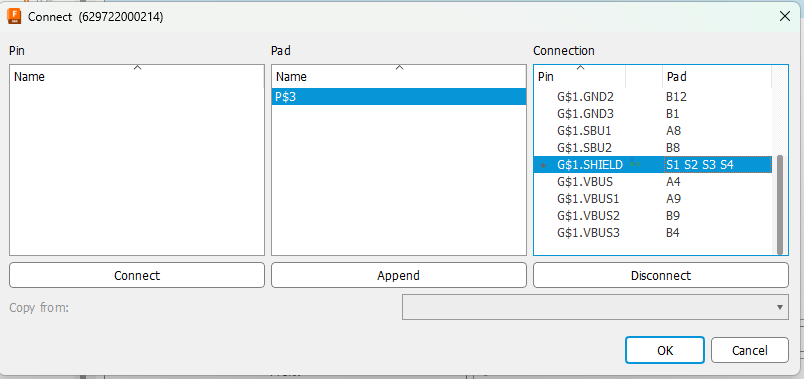
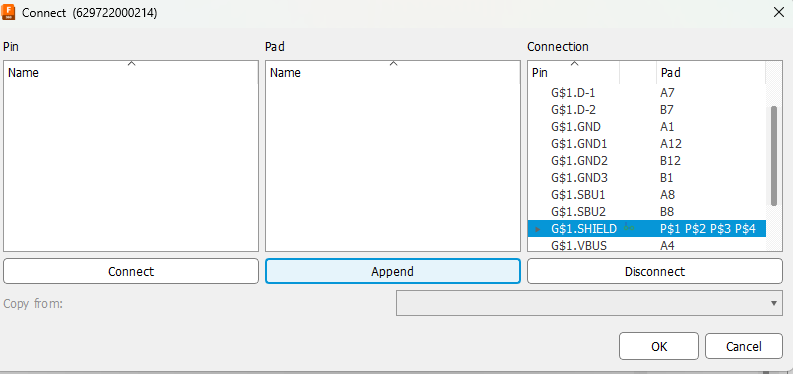
2. Disconnect symbol and footprint
We must disconnect the symbol and footprint in the device manager of the library in order to update the footprint.
3. Delete old pads
Disable all unused layers in the footprint editor, then use the select tool to mark the old pads, right click, select “Delete Group”.
4. Add plated slots
- Click the “Place PTH Pad” button.
- Select the “Slot” option.
- Specify the length of the inner slot and the annular ring, keep in mind to follow our design rules.
- Place the pad
5. Connect symbol and footprint
In order to use the updated footprint, we need to connect the footprint and symbol again.
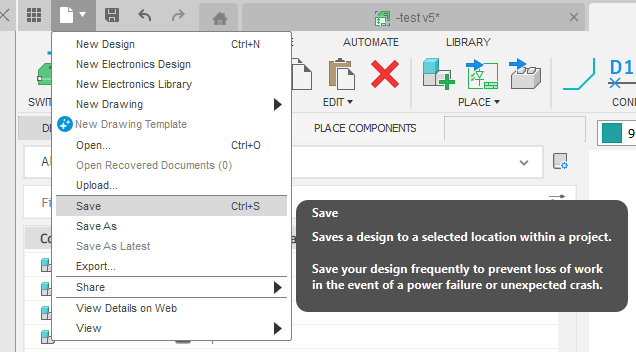
6. Save the library
After applying the changes, save the library with the keyboard shortcut Ctrl+S or via the file dialog. You’re now ready to go with your updated and future proof footprint.
Export your design
Check out our guide on how to export your design as ODB++ file from Fusion360: Support for Autodesk Fusion360
Known PCB Design Tool issues
Issue: Fusion360 .fbrd pcb files cannot be processed
-
Description:
We are unable to process the .fbrd files. -
Workaround/Fix:
This is considered a no-fix. As a workaround, Fusion360 customers can use the ODB++ export as highlighted in our import guide.
Issue: Legacy Designs with plated slots are not processed properly
-
Description:
The milling layer has been disabled for ODB++ files, breaking legacy designs. -
Workaround/Fix:
Update the design to use the new plated slots feature. For more information, see: we have added a section on how to do this above.